Saturday, June 28, 2014

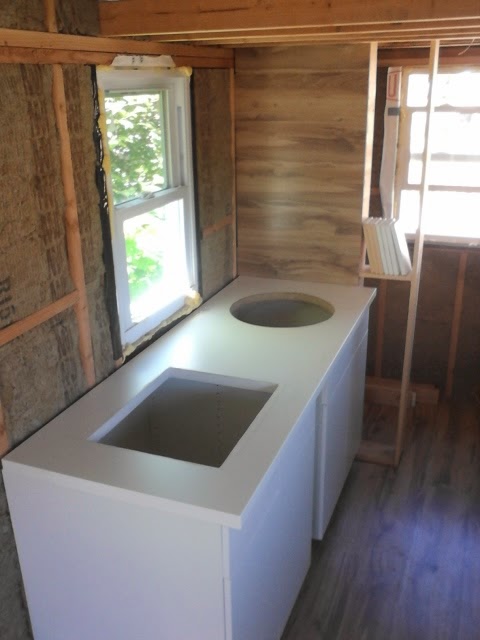
Cooktop and sink, port side

Here we are again for the Sunday update.  Still working on the kitchen area.  Not feeling like I've accomplished very much this week, but definitely crossing things off the list, so I need to re-think my accomplishment statement.  My neighbor gave me a reference for a propane plumber...still need to call him. Step in the right direction.

This is where I started, cutting the countertop to the length I wanted made me a little nervous.  Measure a million times, cut once was the theme this week.  

Figuring out just how far from the edge I needed to put the cooktop and sink.  Again measure a million times...


Drilled holes in all the corners of the rectangle where the cooktop was going to go, and started with a dull blade in the jigsaw.  After one short side decided to change the blade and that made cutting so much easier.  

Sealed the inside of the cut edges. You'll notice that the cooktop rectangle has been sealed and the sink circle has not been sealed yet.   

Sink and faucet holes sealed, cooktop in place.

Cooktop and sink in place. The sink came with a foam strip to seal it to the countertop and prevent moisture from getting below the lip of the sink, but I decided to use plumber's putty instead. I figured it would make a better seal.  The reviews and comments I've read online said that the foam strip was sufficient, but my gut said plumbers putty.  So plumber's putty.  It worked very nicely.

And here it is with the cooktop, sink and faucet in place, as well as the countertop correctly attached to the cabinets.  Now to call the plumber about the propane.

Sunday, June 22, 2014

More insulation and more wall covering

Here is where I began today.  I realize that my previous post said that my next to-do item was putting the sink and cooktop in the counter on the port side, but I changed my mind...that woman's prerogative thing again.

I decided to finish up the insulation. I wanted to redistribute the large and space-filling package of insulation instead of putting it in the loft to store it.  It worked out pretty well. All the spaces that needed insulation are now full of insulation. I had just one batt left over. I realize that I'll have to take the insulation out when I finally get around to having someone do the propane plumbing. This insulation is very easy to work with so that won't be a problem, besides the fact that I'll only need to take out a few batts. See why at the bottom of this post...new topic.  So here is the port wall with completed insulation! No more built in storage shelves for little things like miscellaneous screws, safety glasses, pencils, or levels.  Oh well, I'd rather have the wall finished anyway.  With the insulation finished, I moved on to...

Wall coverings! Now the porch end wall is completely finished.  Then I moved on to the...

...starboard side wall that needed one row at the top of the wall where it meets the ceiling.  Still debating how I want to trim that particular junction.  I've thought about using flat trim, rope, caulk and paint...no final determination though.

Also filled in the spaces between the rafters in the kitchen...

...and under the storage loft.

About the whole propane conversation...I know that my cooktop and water heater use propane.  They are close together, so I'll have those plumbed together.  The uncertainty lies with the heater.  The heater I ordered two months ago has been on backorder and seems it will be on backorder until the end of June. That part is not a problem, but it did get me thinking about whether or not that particular heater is the right choice. It is built to heat WAY more than my space requires (most heaters are).  Other reasons include the fact that I don't know where I will be parking my house. If I go back to Alaska, I'll need that kind of heat in the winter. If I park in San Diego (or New Smyrna Beach, FL), the radiant floor will be sufficient.  Final decision for today...cancel the order and decide on heat at a later time.  There are so many options, and plumbing the heater separately is something I've contemplated for a long time.  

This weekend was also front-yard-makeover weekend.  This is the small house I live in...not tiny. It is about 1100 square feet and has a gigantic mass of poppies that beautify the front garden in the spring.  Unfortunately, after the poppies are spent, the flower stems and foliage turn brown and look like a gigantic mass of tall weeds!  So, I pull them all out and rebuild the garden to look like this.  I was so excited that my Calla Lilly survived.  It was so hidden in the poppies that I didn't even know it was there!  I've put in more perennials this year, so maybe next time I'll only need to pull out the poppies and refresh the mulch.  Although I will admit that I love the little masses of color that impatiens add.  Still pondering the glories of what to put under the big window, and the gal at the nursery yesterday hinted that there is a variety of strawberry that grows well in the shade.  That spot gets NO sun, so it might turn into a strawberry patch. :)  

For comparison...this year's poppy crop.

Sunday, June 15, 2014

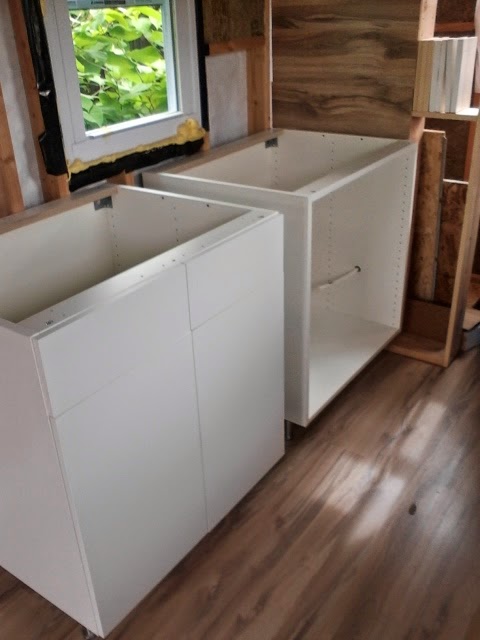
Port side cabinets

I've gotten a couple of things finished since my last post.  First, I put the laminate flooring on the storage loft floor.  Second...

Put together the cabinets for the port side where the sink and cooktop will go. 

Drilled a couple of holes for the water and cut a hole for the outlet that is in the same cabinet.  

And there's the counter on top...well, still in the box but it is in the place where it belongs anyway.  Tomorrow I'll cut the holes for the sink, faucet, and cooktop and get those put in.  The to-do list is getting shorter!  

Tuesday, June 10, 2014

Ceiling fan

With the ceiling finished except for trim I cleared out one more box and put up the ceiling fan.  It is very cute and small. Matches the cuteness and smallness of the rest of the house.  Now I just need a bit of power to make it go.

Wednesday, June 4, 2014

Ceiling covering

With the insulation and the gable ends finished, it was time to put up the ceiling. So I snapped a chalk line and started the port side. I got all the way to the second to the last full row and realized that I had crazy gaps...meaning that some row below wasn't lined up properly.  I thought I had been quite careful about that, but apparently not.  I figured I could live with the gaps and just fill them in and not be bothered by it.

So here is the port side almost finished...just missing the last row.  Notice the gaps in the last two rows.  

Started on the other side.

Starboard side finished all the way to the peak.  Just one last row on the port side and done...but then...

The perfectionist kicked in, and I started wondering if the gaps on the port side would forever bug me.  I decided that they would, even if they were filled.  So I took the port side completely down because the offending misaligned row was actually the bottom row.  Of course.  Arggghhhh!  If I fixed it now, it would be relatively easy.  If I decided to fix it later, I knew I would be kicking myself for not fixing it when it was relatively easy.  So it took me a few days to get up my courage enough to take the port side down, then a few more days to get up the courage to start over.  Then a few more days to get over my frustration, and I got back to the place I started with all but the last row up.  Then today I finally finished the ceiling.  NO GAPS!!  YEHAAAAA!!  Guess it is time to decide on some trim.